![](https://tingyucho.home.blog/wp-content/uploads/2021/07/image-130.png?w=1024)
之前打工的時候常常會需要寄信給客戶,但是信件的資料地址卻是要一筆一筆輸入資料,自從發現Word有合併列印功能後,兩分鐘就把煩人的東西解決了!
操作流程
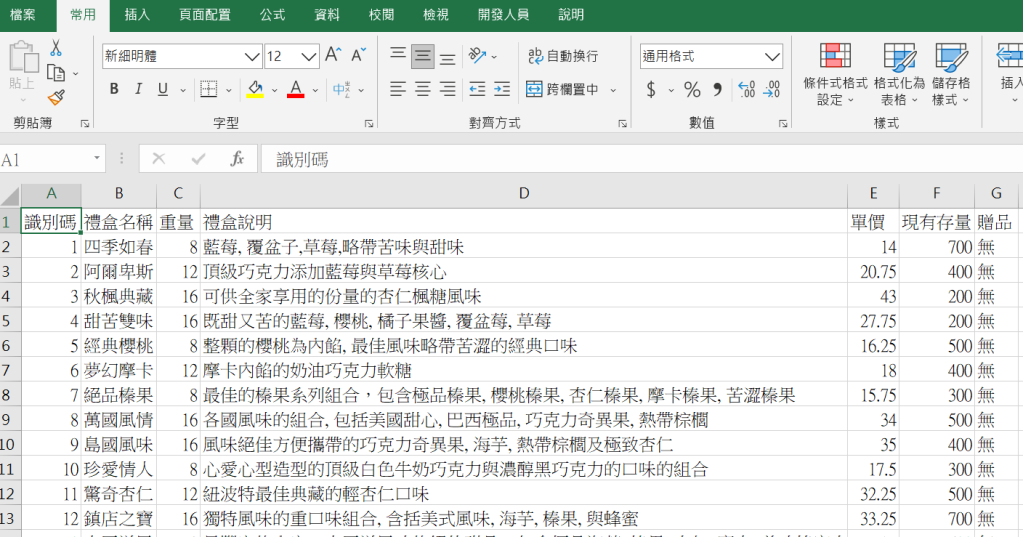
1.將要製作成貼紙的資料輸入成Excel檔,輸入完成後務必將檔案關閉
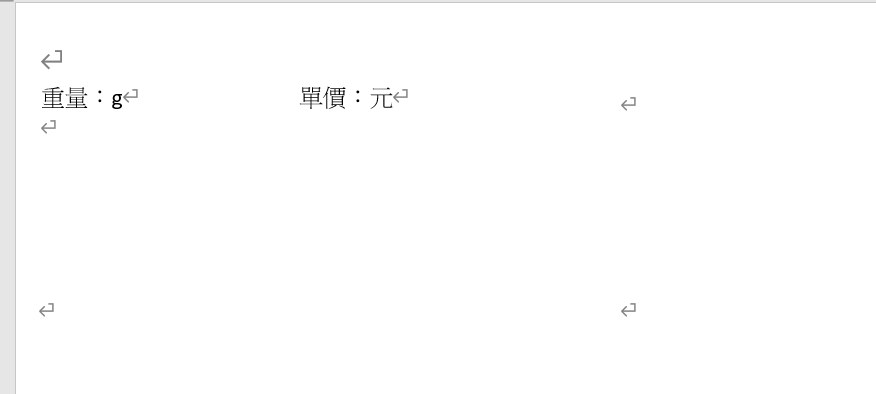
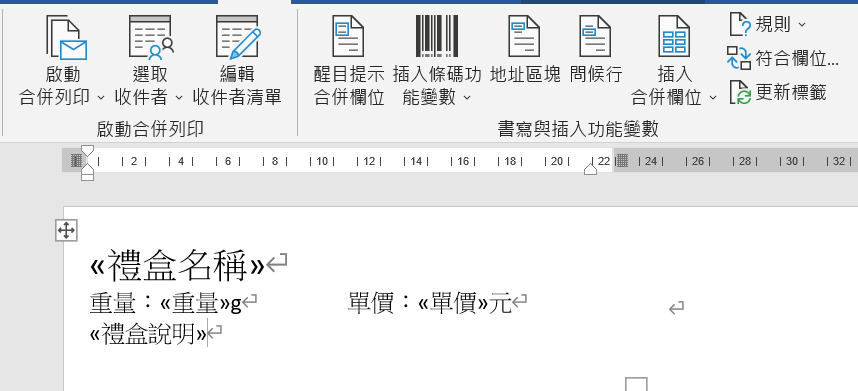
![](https://tingyucho.home.blog/wp-content/uploads/2021/07/image-119.png?w=1024)
2. 打開 Word 設定欲顯示的欄位
![](https://tingyucho.home.blog/wp-content/uploads/2021/07/image-120.png?w=1024)
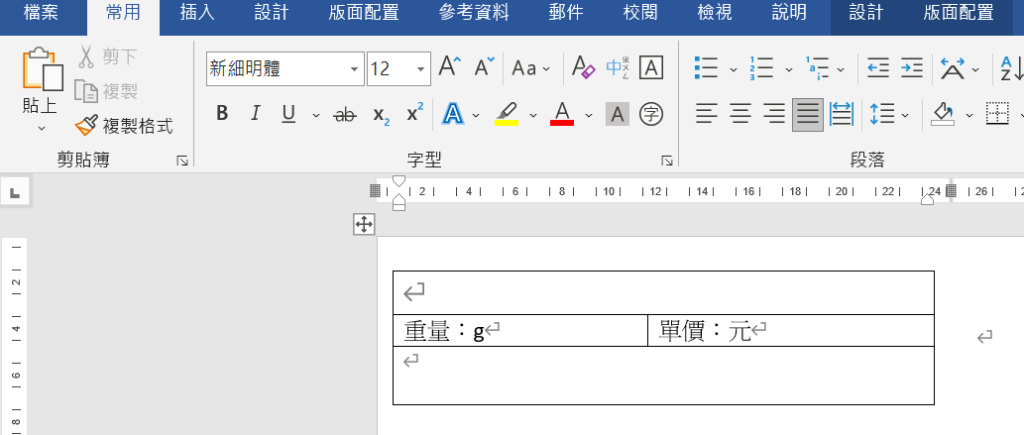
利用表格設定並將設定好的表格隱藏看起來更美觀
![](https://tingyucho.home.blog/wp-content/uploads/2021/07/image-121.png?w=876)
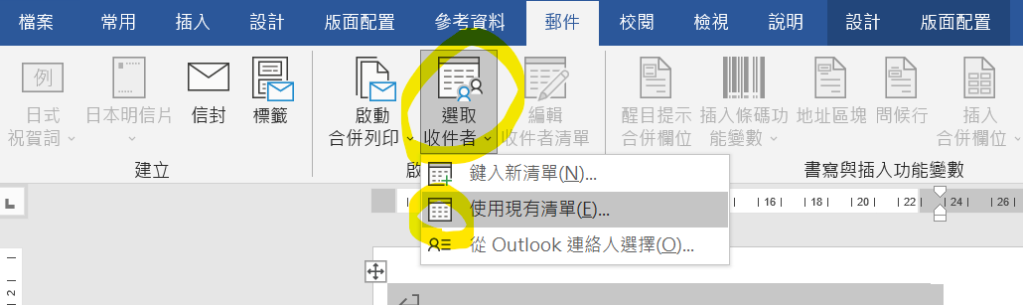
2. 點選 郵件 > 選取收件者 >使用現有清單,打開輸入好的Excel檔
![](https://tingyucho.home.blog/wp-content/uploads/2021/07/image-122.png?w=1024)
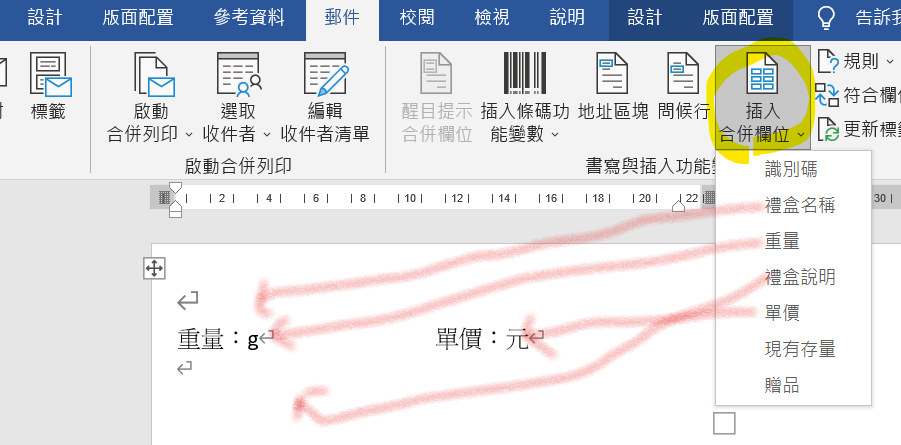
3. 點選插入合併欄位,在相對應的位址上插入對應欄位
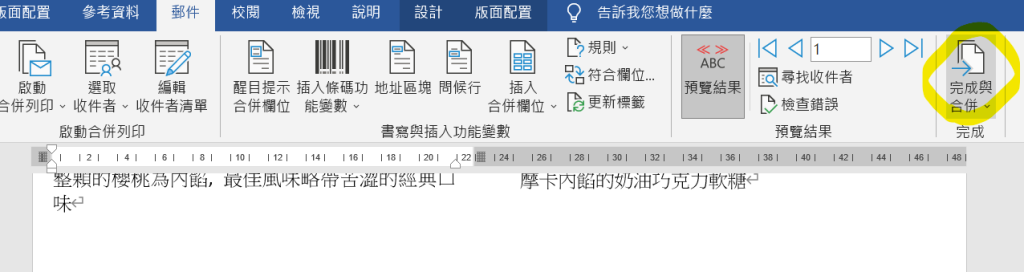
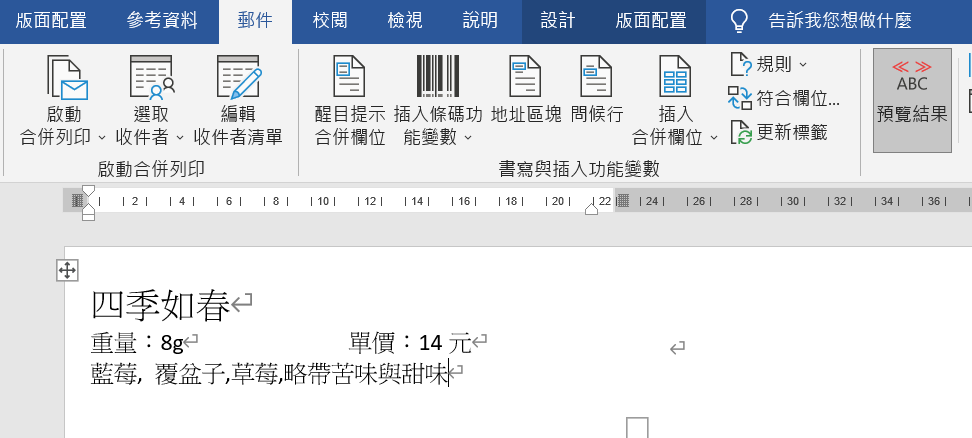
![](https://tingyucho.home.blog/wp-content/uploads/2021/07/image-123.png?w=901)
![](https://tingyucho.home.blog/wp-content/uploads/2021/07/image-124.png?w=858)
點選預覽結果可以看到第一筆資料
![](https://tingyucho.home.blog/wp-content/uploads/2021/07/image-125.png?w=972)
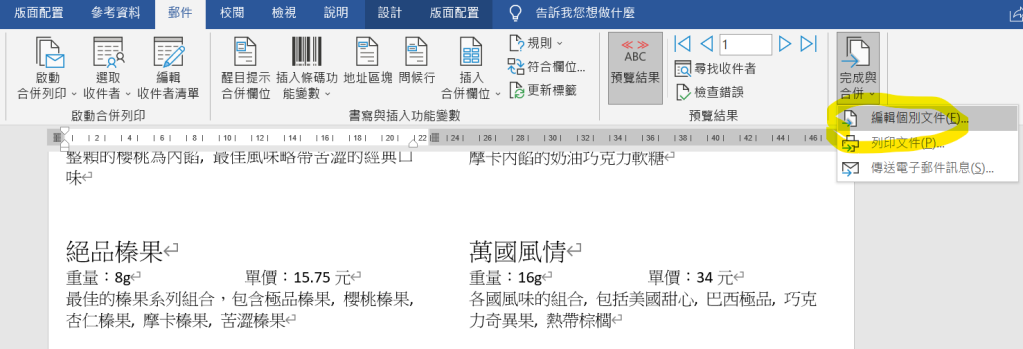
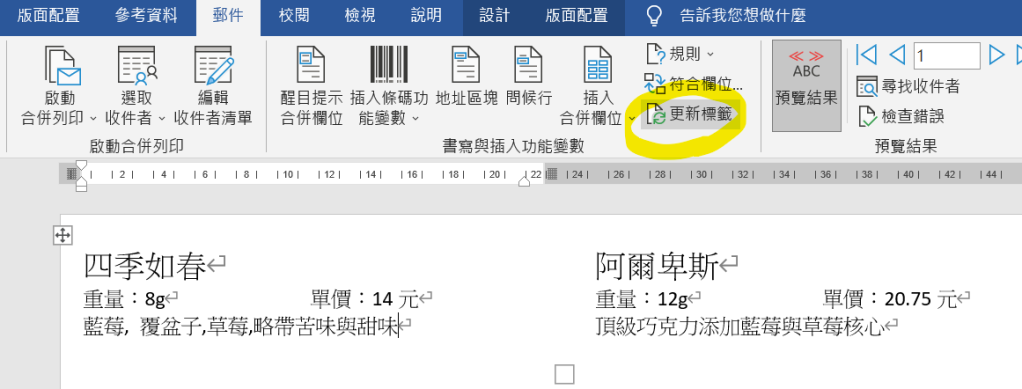
4. 確認對應欄位無誤後,點選 更新標籤 ,後面的資料也會自動帶入,若資料量大,更新標籤紙會帶入第一頁資料
![](https://tingyucho.home.blog/wp-content/uploads/2021/07/image-126.png?w=1024)
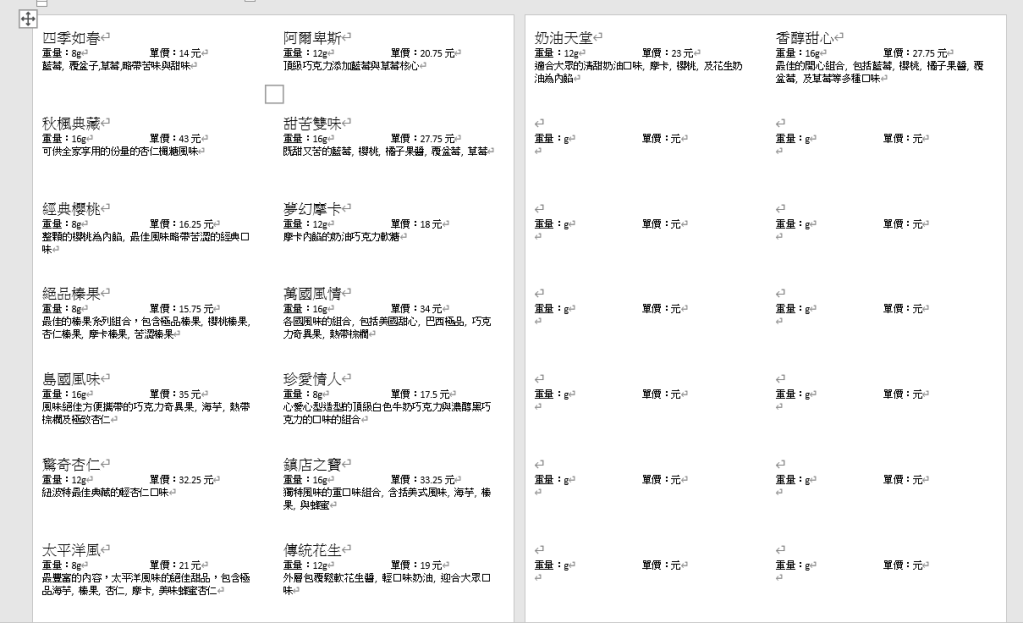
5. 完成後選取 編輯個別文件,新的標籤就都做好了~~
![](https://tingyucho.home.blog/wp-content/uploads/2021/07/image-127.png?w=1024)
![](https://tingyucho.home.blog/wp-content/uploads/2021/07/image-128.png?w=1024)
![](https://tingyucho.home.blog/wp-content/uploads/2021/07/image-129.png?w=1024)