![](https://tingyucho.home.blog/wp-content/uploads/2021/11/file-move-2-3.gif?w=800)
因為工作的關係大量地使用Power Point,意外地發現Power Point也有好多好玩的功能,最近被指派做出看起來很酷炫的動畫,一開始本來以為會很難,後來發現做動畫的邏輯好像跟之前剪片差不多,摸一摸也摸出了一些心得,再搭配之前找的免費ICON,在短短的時間內就可以做出很簡單的動畫。
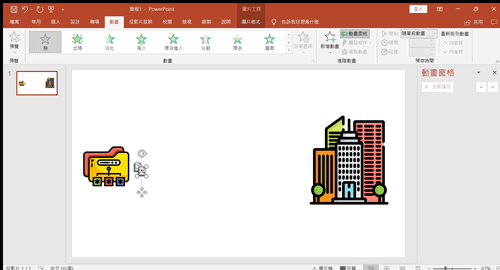
這次做的是資料傳輸的動畫,用示意圖的方式讓資料從A地移動到B地:
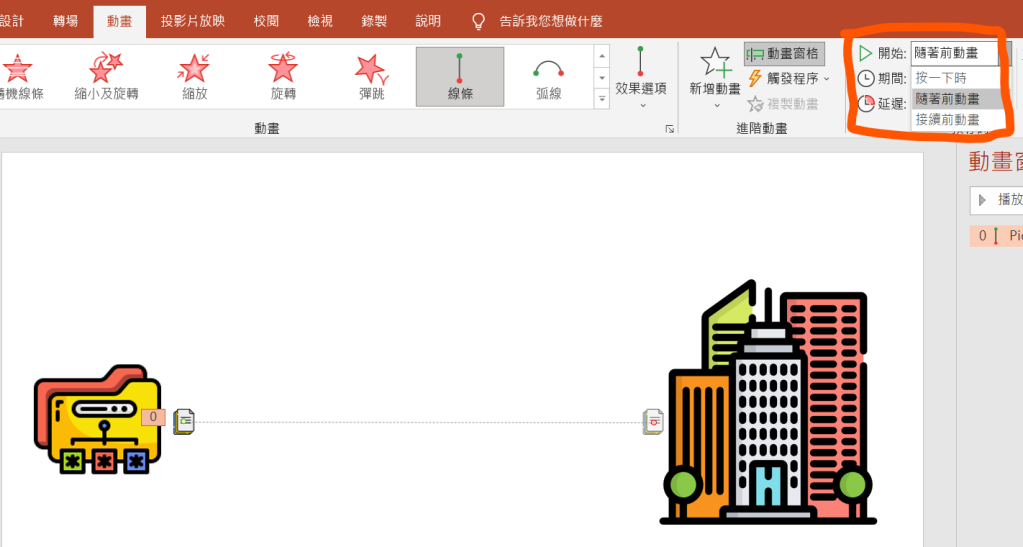
方法一:利用移動路徑讓圖片移動
![](https://tingyucho.home.blog/wp-content/uploads/2021/11/file-move-1.gif?w=800)
- 選擇【新增動畫>【線條
![](https://tingyucho.home.blog/wp-content/uploads/2021/11/image-2.png?w=640)
2. 調整起始點(綠色箭頭)與終點(紅色箭頭),綠色箭頭旁的1代表需按一下才會開始動作
![](https://tingyucho.home.blog/wp-content/uploads/2021/11/image-3.png?w=1024)
3. 點選【隨著前動畫】綠色箭頭前的1會變為0,代表只要滑到這一頁就會就會有動畫,不需再點一下滑鼠
![](https://tingyucho.home.blog/wp-content/uploads/2021/11/image-5.png?w=1024)
方法二:利用圖片出現與消失做轉移動畫
![](https://tingyucho.home.blog/wp-content/uploads/2021/11/file-move-2-2.gif?w=800)
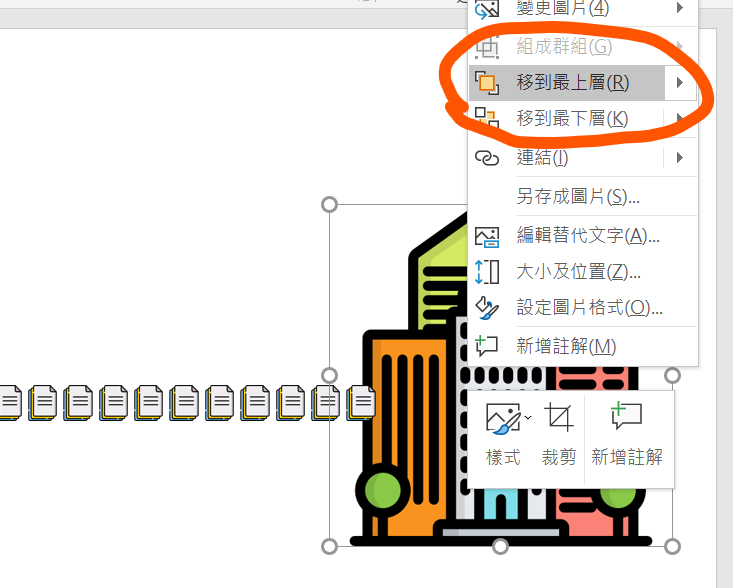
1. 選擇檔案圖案,按下Ctrl+D複製圖片調整位置後,重複Ctrl+D,就可新增整齊的檔案線條
![](https://tingyucho.home.blog/wp-content/uploads/2021/11/file-move-2-1.gif?w=500)
![](https://tingyucho.home.blog/wp-content/uploads/2021/11/image-6.png?w=1024)
2. 將目的地圖片【移至最上層】,擋住新增的檔案圖片
![](https://tingyucho.home.blog/wp-content/uploads/2021/11/image-7.png?w=733)
![](https://tingyucho.home.blog/wp-content/uploads/2021/11/image-10.png?w=583)
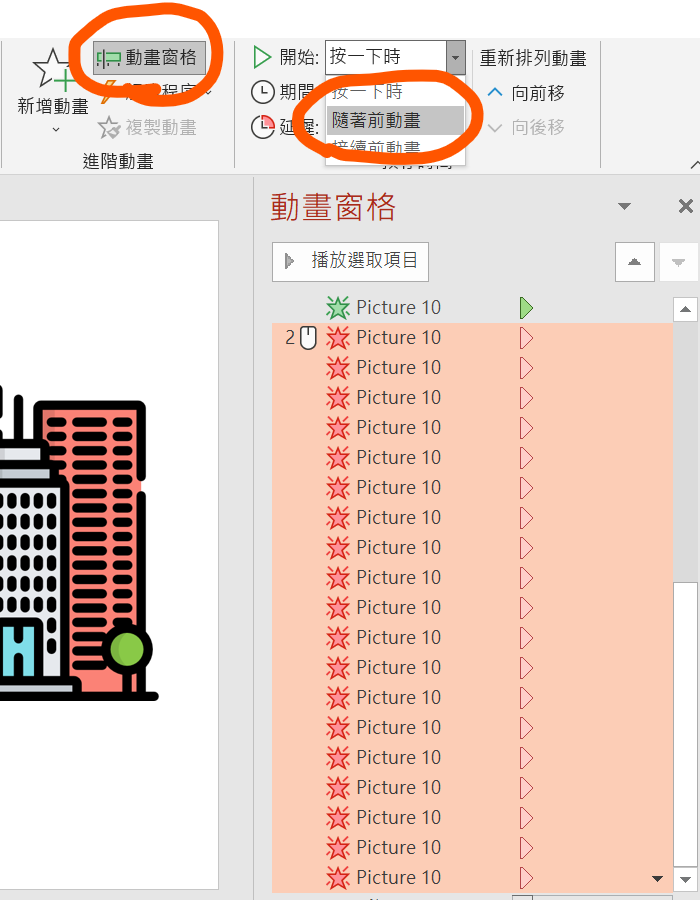
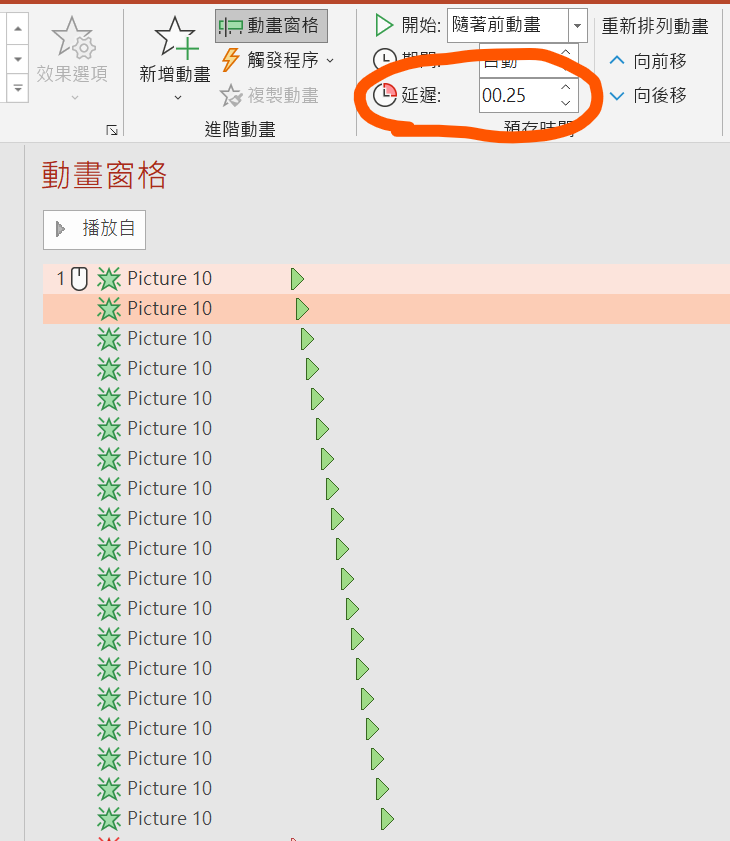
3.將每個檔案圖片新增【進入】>【出現】與【離開】>【消失】動畫
![](https://tingyucho.home.blog/wp-content/uploads/2021/11/image-13.png?w=1015)
![](https://tingyucho.home.blog/wp-content/uploads/2021/11/image-14.png?w=1024)
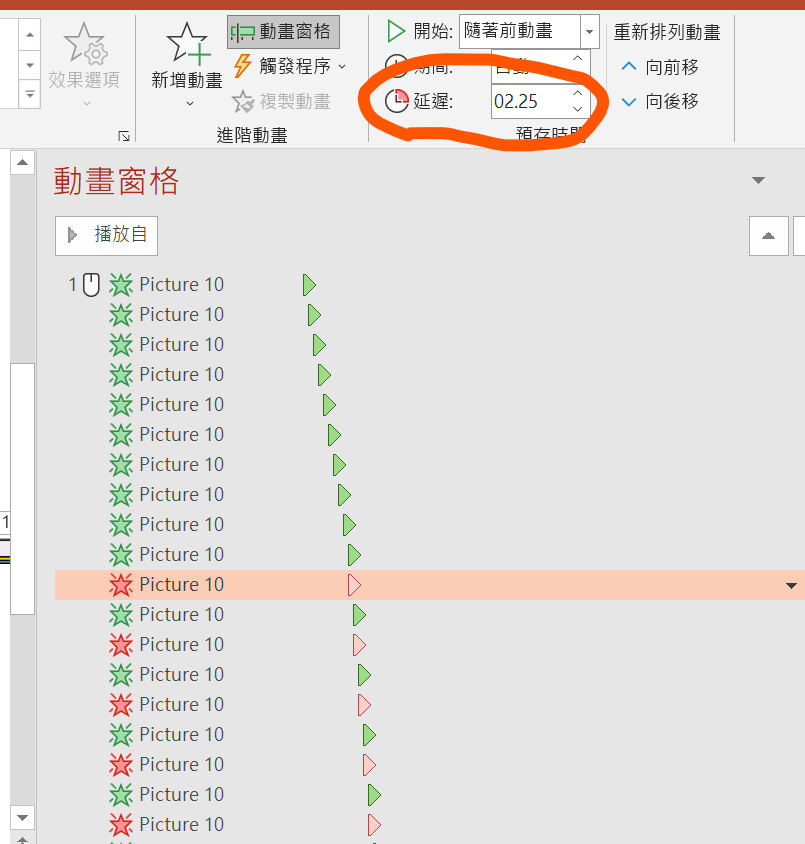
4. 打開【動畫窗格】,將【離開】>【消失】(紅色星星)動畫選取,並選擇【隨著前動畫】
![](https://tingyucho.home.blog/wp-content/uploads/2021/11/image-15.png?w=700)
5. 調整【進入】>【出現】(綠色星星)延遲秒數,可依個人喜好,我這裡設定每個都比前一個延遲00.25秒
![](https://tingyucho.home.blog/wp-content/uploads/2021/11/image-16.png?w=730)
6. 將【離開】>【消失】(紅色星星)照順序移動至上,建議從延遲2秒以後開始消失,同樣每個紅色星星間隔一定秒數
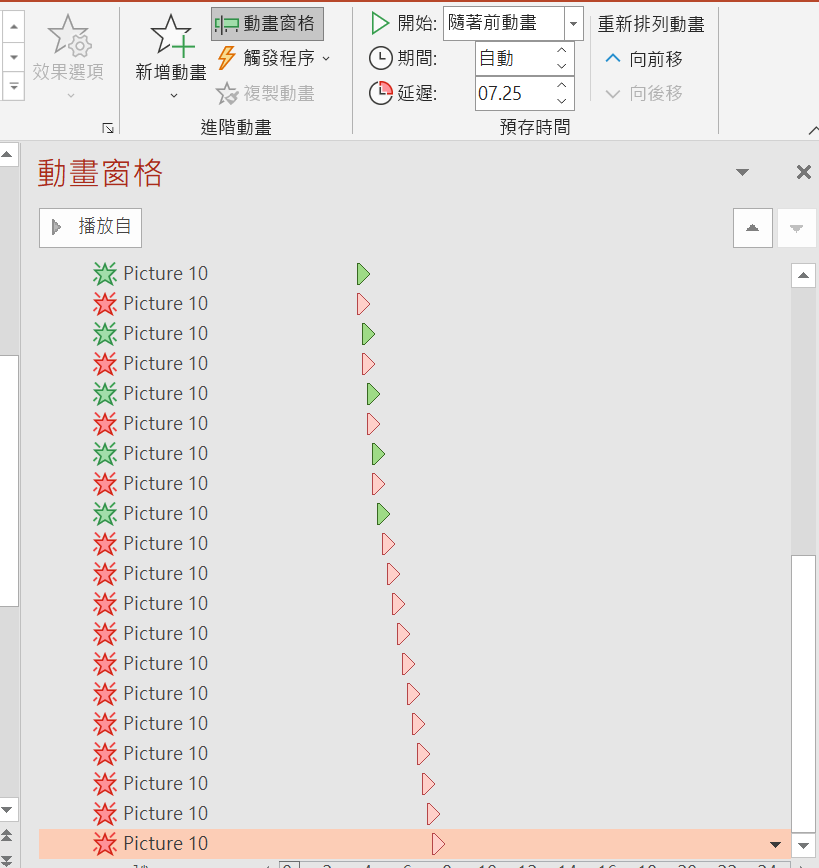
![](https://tingyucho.home.blog/wp-content/uploads/2021/11/image-17.png?w=805)
![](https://tingyucho.home.blog/wp-content/uploads/2021/11/image-19.png?w=819)
7. 調整完後就完成了~
![](https://tingyucho.home.blog/wp-content/uploads/2021/11/file-move-2.gif?w=800)